Natural World Photoshop Production Notes
Digital watercolor textures[edit]
Photoshop brush settings[edit]
Created photoshop brush base on "Kyle's Real Watercolor - 2 40" using my own seamless paper texture from a scan of Arches hot press watercolor paper.
The brush was modified to have a slight variation in color by adding Color Dynamics settings in the Photoshop Brush Settings dialog. The brushes were saved with specific foreground and background colors.
The other desired effect of the brush was to minimize darkening of the color where brush strokes overlapped. There are two settings that seem to control this setting: Transfer and Texture. Texture manifests itself by leaving areas of transparency in the brush strokes, so any overlap is going to build opacity by design. Similarly, Transfer allows brush strokes to be more transparent, so that overlapping strokes will be more opaque. I.e. there's only so much you can do.
Photoshop brush presets are saved at Google Drive > creative > photoshop > brushes > comics (the natural world).abr (download)
Removing dark overlapping brush strokes[edit]

- Apply different values on separate layers.
- First fill the layer with solid white. (It's not possible to use the spot healing brush if the brush strokes are applied to transparent pixels.)
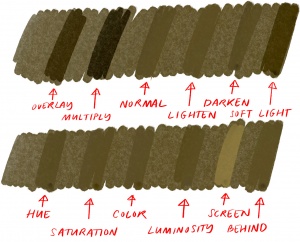
- Change the layer blend mode to Darken.
- Some blend modes for the brushes result in darker or lighter overlapping strokes, depending on the colors being applied.
- Use the Spot Healing Brush to remove layers of overlap.
- Sample All Layers:
unchecked - Mode:
Lightento preserve white areas adjacent to brushstrokes as much as possible - Mode:
Normalto remove white areas adjacent to brushstrokes
- Sample All Layers: